

Converting to BDD
To use a Markdown test as a BDD test, rewrite it as a Gherkin scenario. Changing the project setting alone does not convert the test.
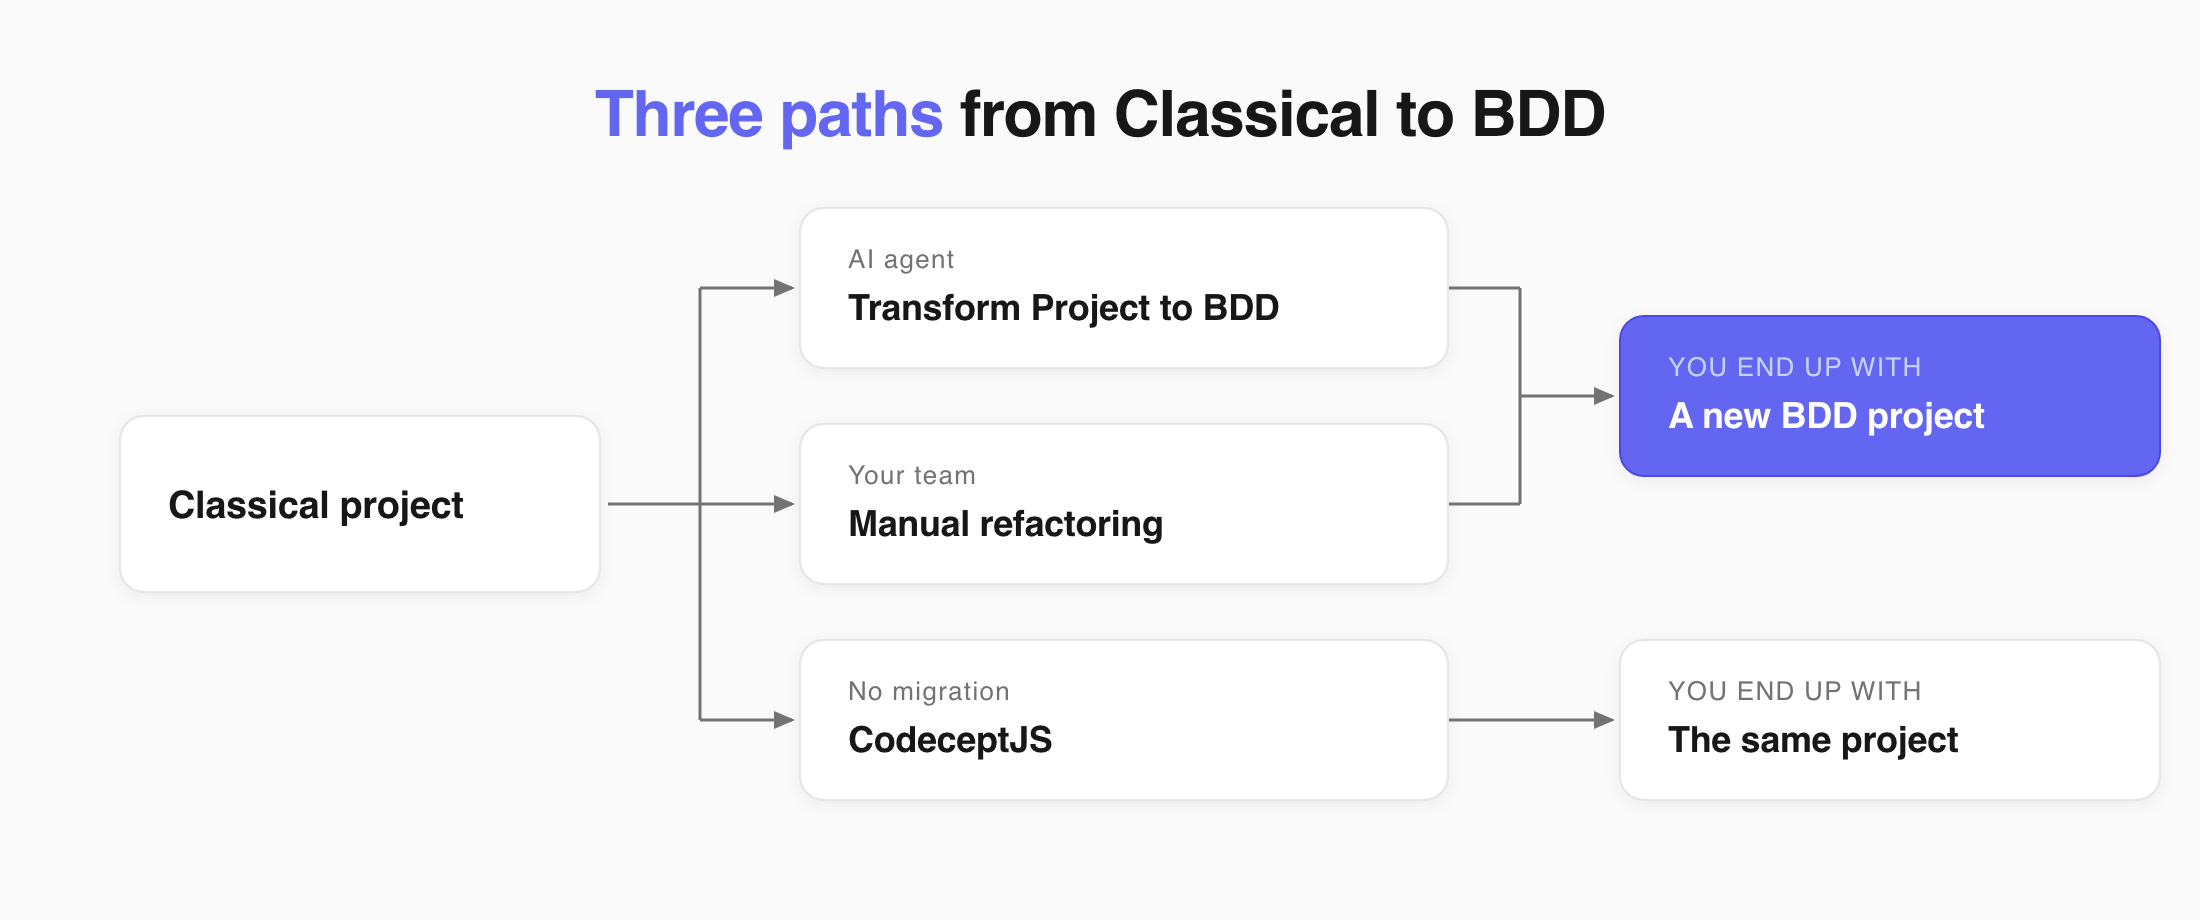
You have three paths. Two build a new BDD project. The third keeps you in Classical.
| Path | What you end up with | Best when |
|---|---|---|
| Transform Project to BDD | A new BDD project, built from your existing tests | You want everything moved quickly and written in one style |
| Manual refactoring | A new BDD project, written by your team | The logic is tricky and a person has to make the calls |
| CodeceptJS | No new project - you stay Classical | You want tests the business can read, without taking on Gherkin |
Transform Project to BDD
Section titled “Transform Project to BDD”Transform Project to BDD is an AI agent that reads your Classical tests and builds a BDD project out of them.
- It rewrites your steps into valid
Given/When/Thensyntax. - It creates a new BDD project with the converted suites.
- Your original Classical project stays as it is.
Nothing is overwritten, so you can review the result. To run it:
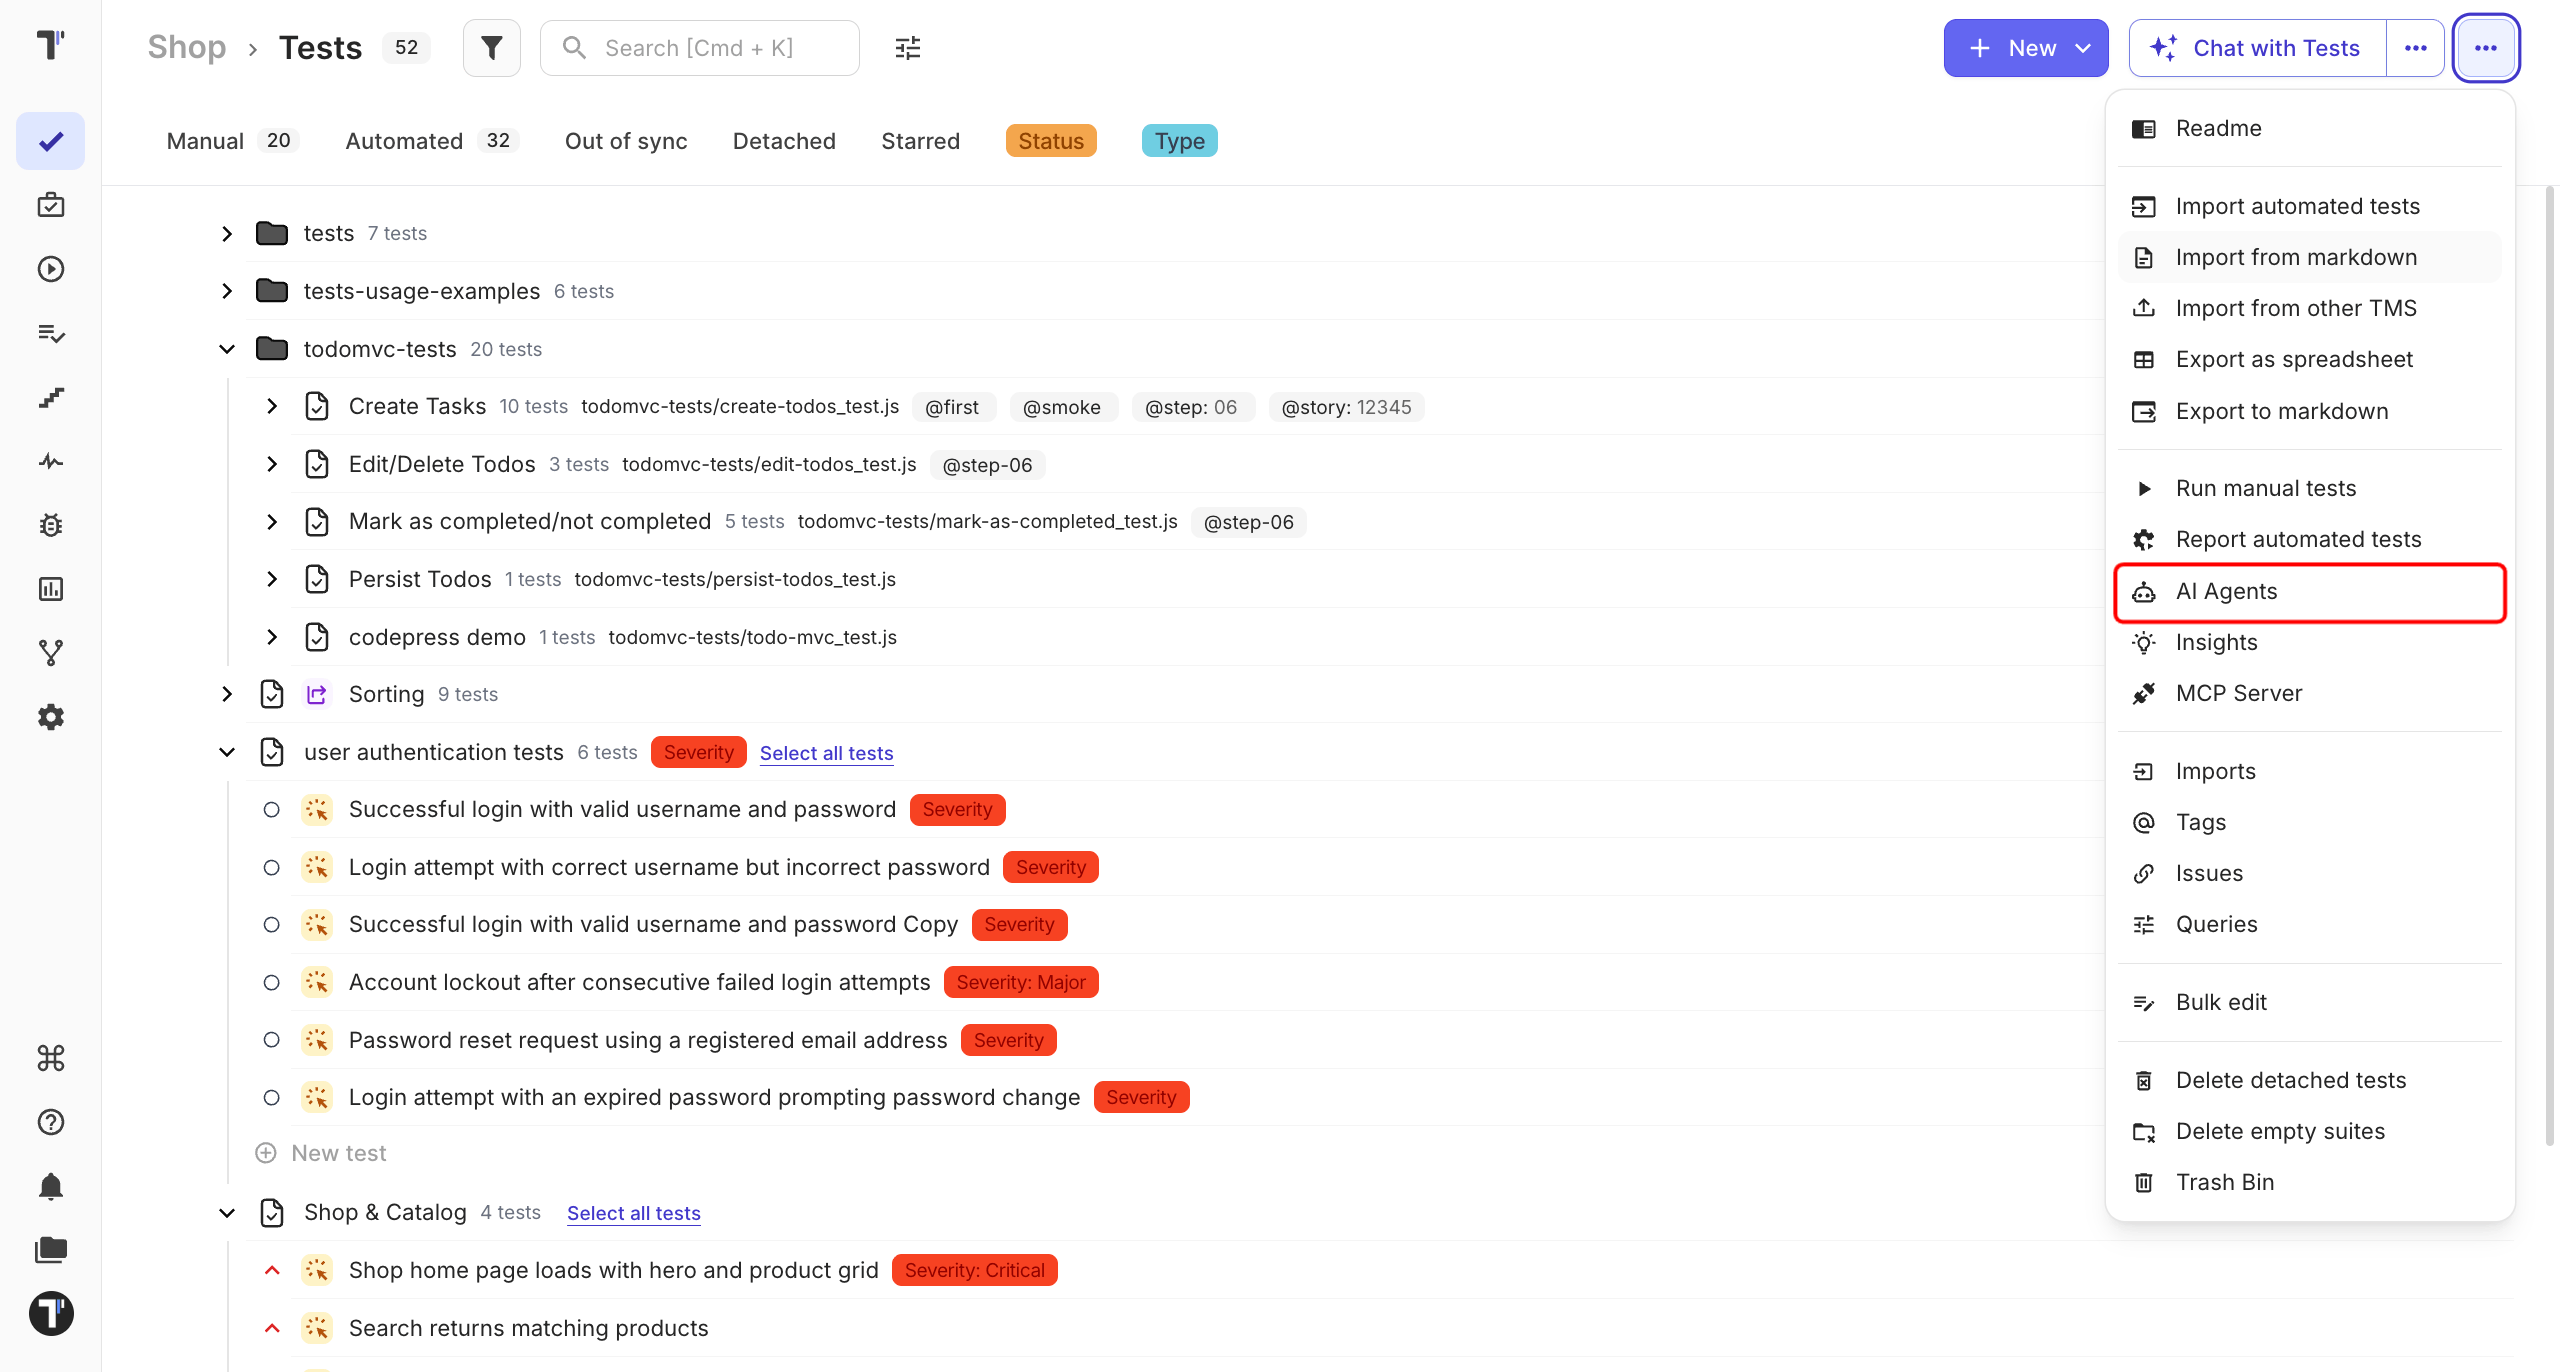
- On the Tests page, open the
...menu. - Choose AI Agents.
- Select Transform Project to BDD.
The agent stays close to your original wording. A Classical step that did two things comes out as one line:
Scenario: Successful login with valid credentials Given the user is on the Testomat.io login page When the user enters a registered email and the correct password Then the user should be redirected to the Project Dashboard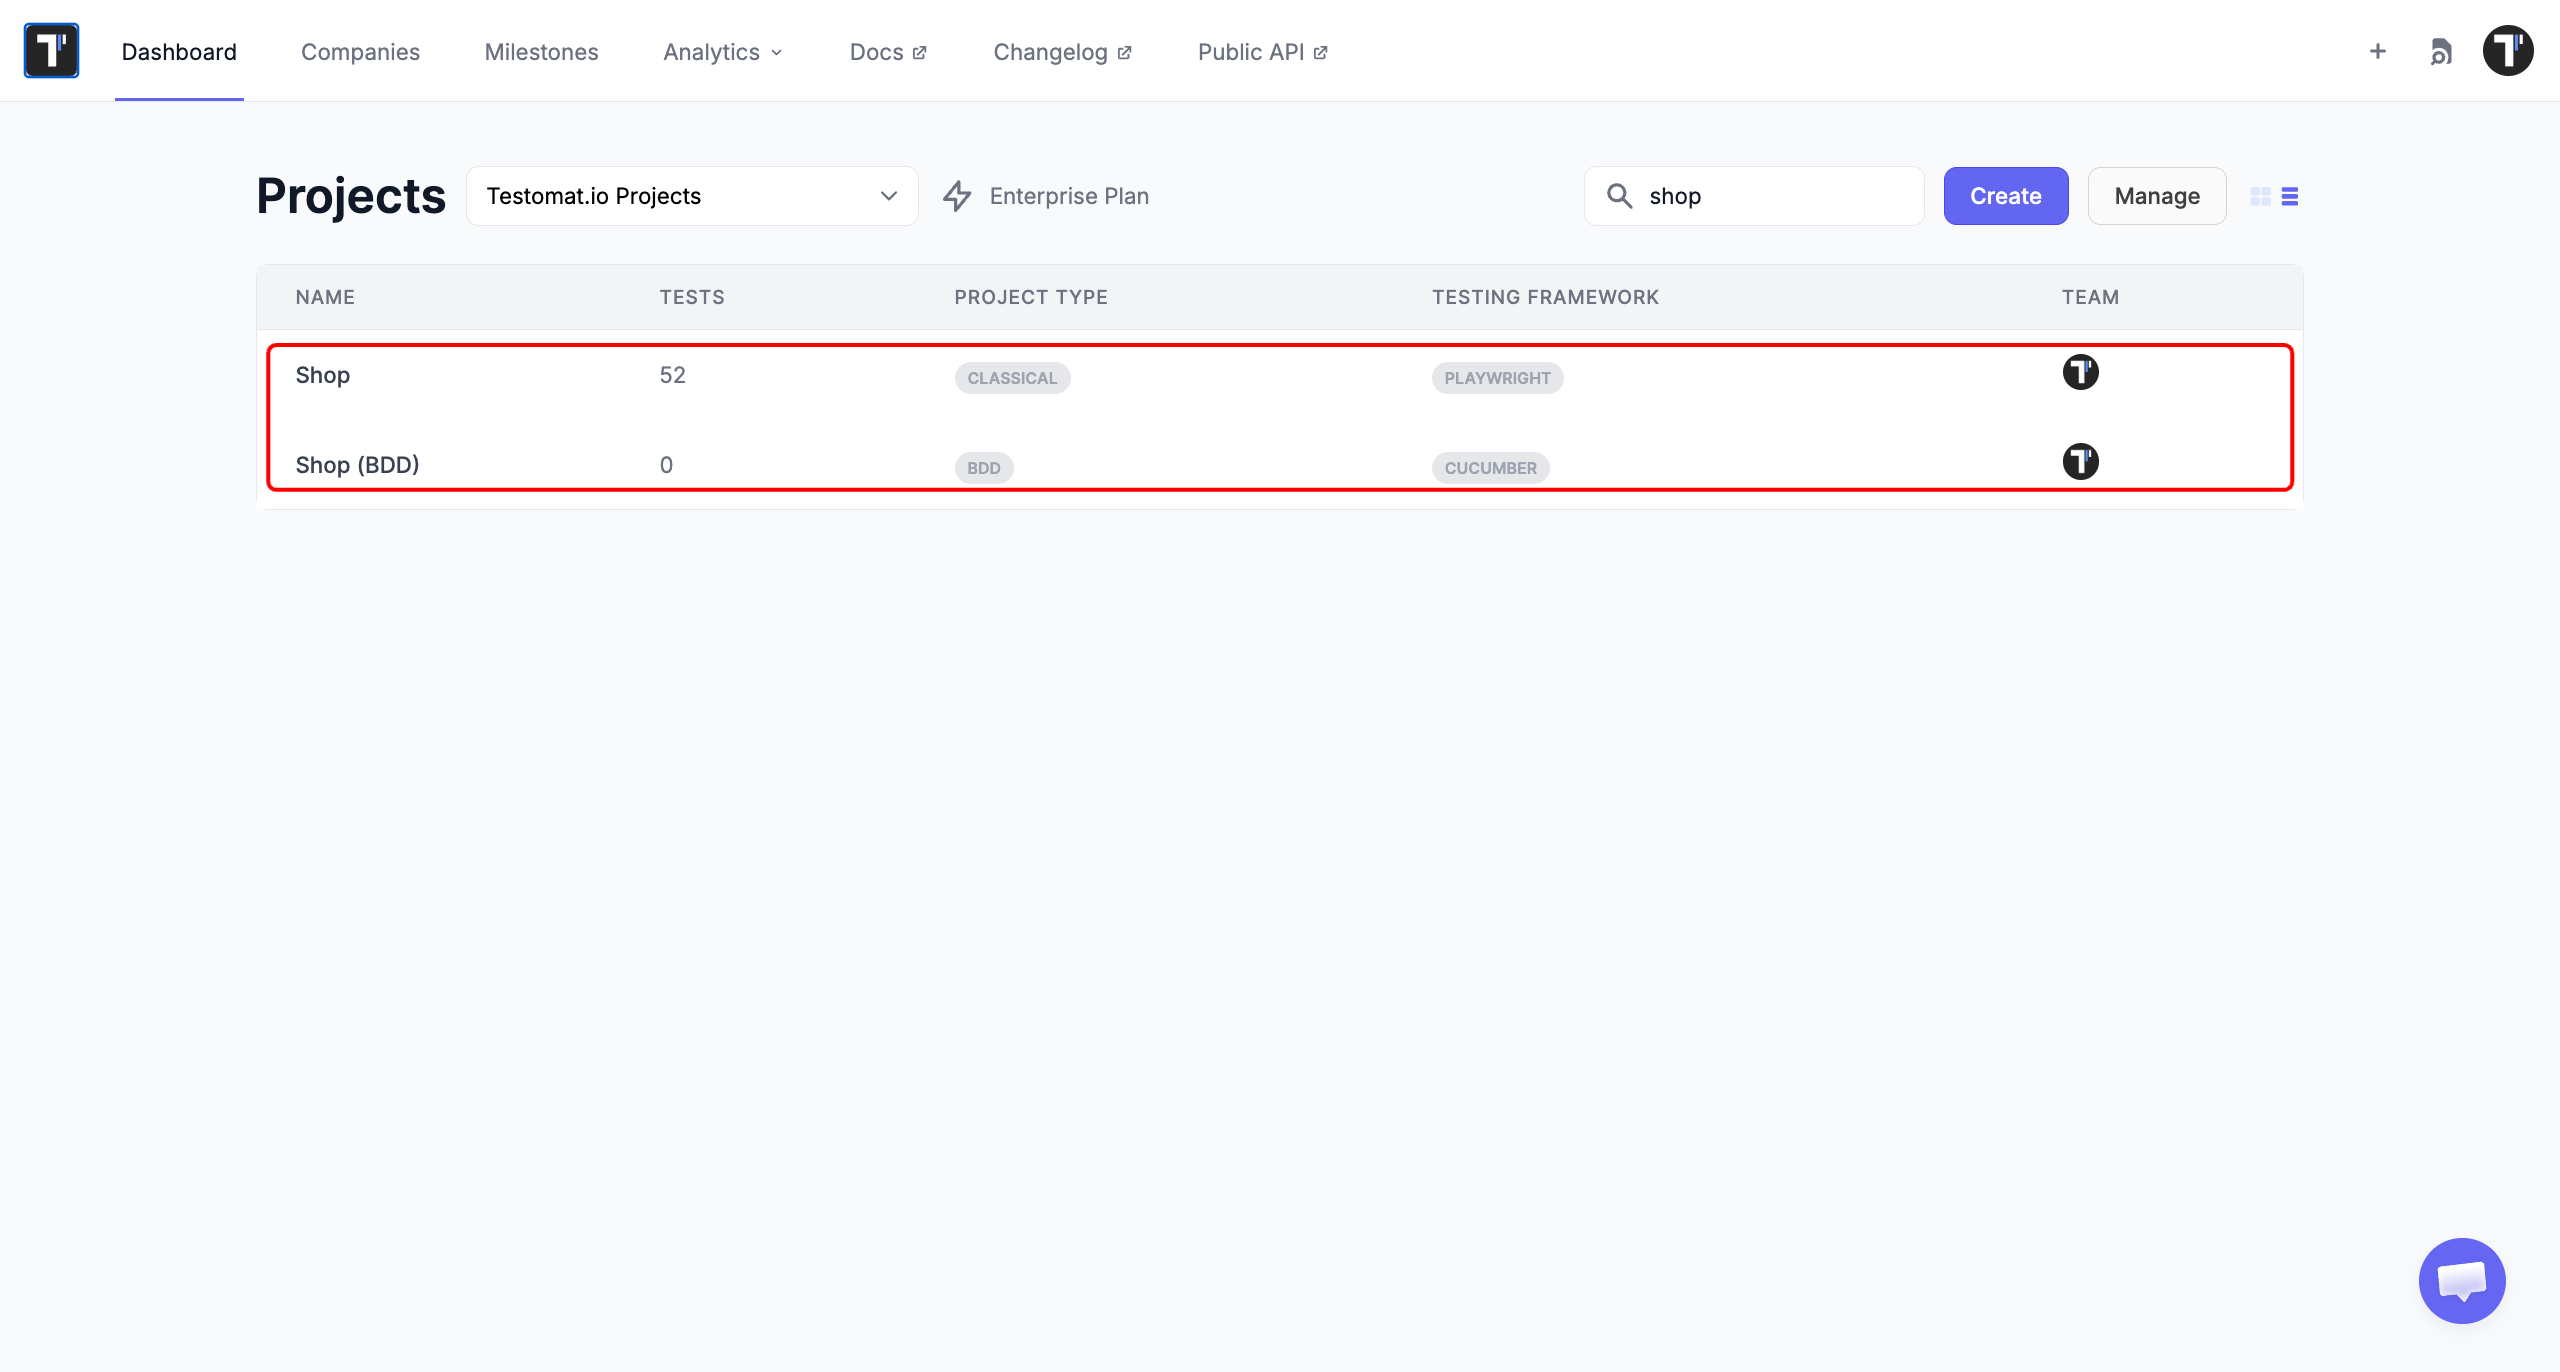
This When line does two things at once, so no other scenario can reuse it.
Manual Refactoring
Section titled “Manual Refactoring”Rewrite the tests yourself when a few of them carry logic only the author understands.
- Create a new BDD project.
- Rewrite each test so every step follows Gherkin rules.
- Split any step that does more than one thing.
- Match each new step to a step definition in your automation code.
Writing it yourself, you split that step:
Scenario: Successful login with valid credentials Given the user is on the Testomat.io login page When the user enters a registered email And the user enters the correct password Then the user should be redirected to the Project DashboardEvery line here is a step definition other scenarios can call. To make the process faster you can:
- Split steps land in the Steps Database, so autocomplete offers them next time.
- If the Gherkin is not valid yet, Save To Draft & View Test keeps your work.
CodeceptJS
Section titled “CodeceptJS”If you just want your tests to be easy to read, you do not need to switch to BDD. CodeceptJS uses simple instructions that are easy for everyone on the team to follow. You can keep your current project without rewriting your tests or learning a new format.
The main difference is who the tests are written for. Gherkin scenarios are written in a way that both the team and the business can understand and review before the code is written. CodeceptJS is still code, just written in a way that is easier to read.
Check the Converted Tests
Section titled “Check the Converted Tests”Four things are worth checking after a conversion, whether the AI agent did the work or your team did.
One action per step. Enter a registered email and the correct password does two things at once, split it:
When the user enters a registered emailAnd the user enters the correct passwordThe goal. Hit the blue 'Sign In' button at the bottom of the form names the colour and the position. The next redesign makes both wrong. Redo:
When the user clicks the 'Sign In' buttonA clear starting point. A Classical test often jumps straight in, assuming the user is already on the right page. BDD code has to know where the scenario begins, and scenarios that say so fail less often for the wrong reason.
Given the user is on the Testomat.io login pageValid syntax. Expected Result: - in BDD the line has to carry a keyword and correct wording:
Then the user should be redirected to the Project DashboardConnect to Code
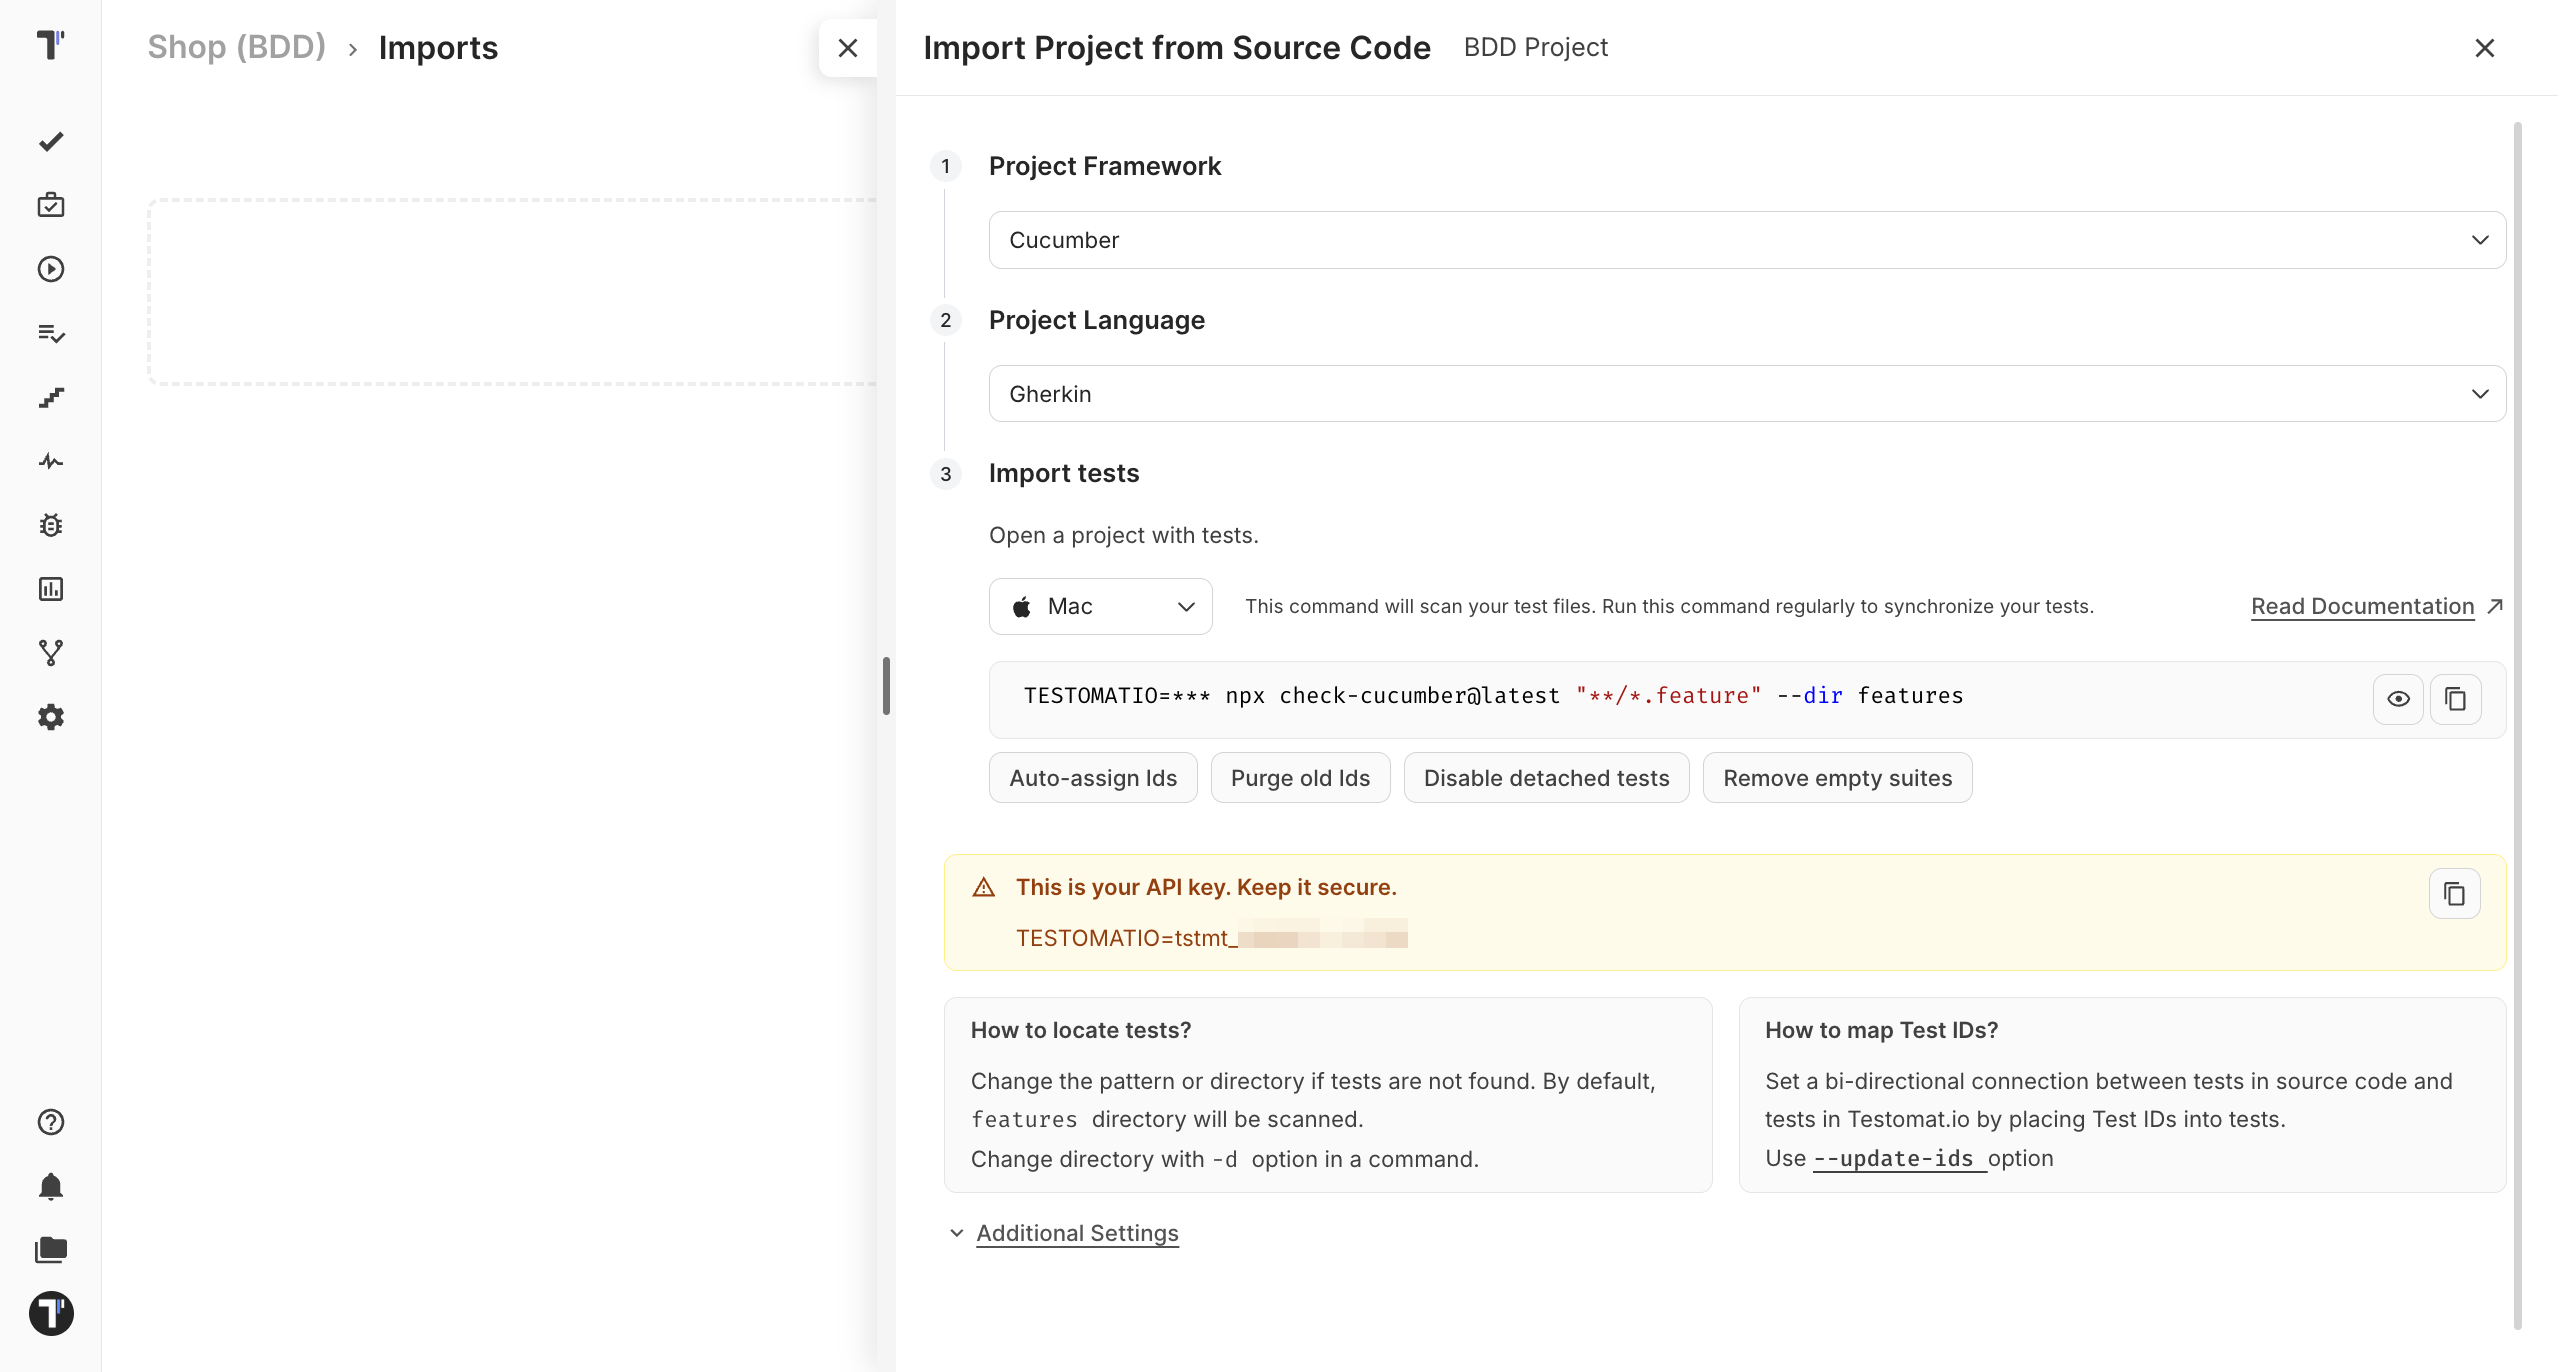
Section titled “Connect to Code”A rewritten scenario is not finished until every step has a definition in your automation code. Import your feature files to make the connection.
- On the Tests page, click Import from other TMS.
- On the Imports page, click Import.
- Select Import from Source Code.
- Pick Cucumber as the framework.
- Copy the command you are given.
- Run it in your project folder:
TESTOMATIO={apiKey} npx check-cucumber@latest "**/*.feature" --dir features- Refresh the page. The imported feature files appear in the test tree.
See Import Tests From Cucumber for the full guide.